Skip to content

Cart

Your cart is empty

In stock

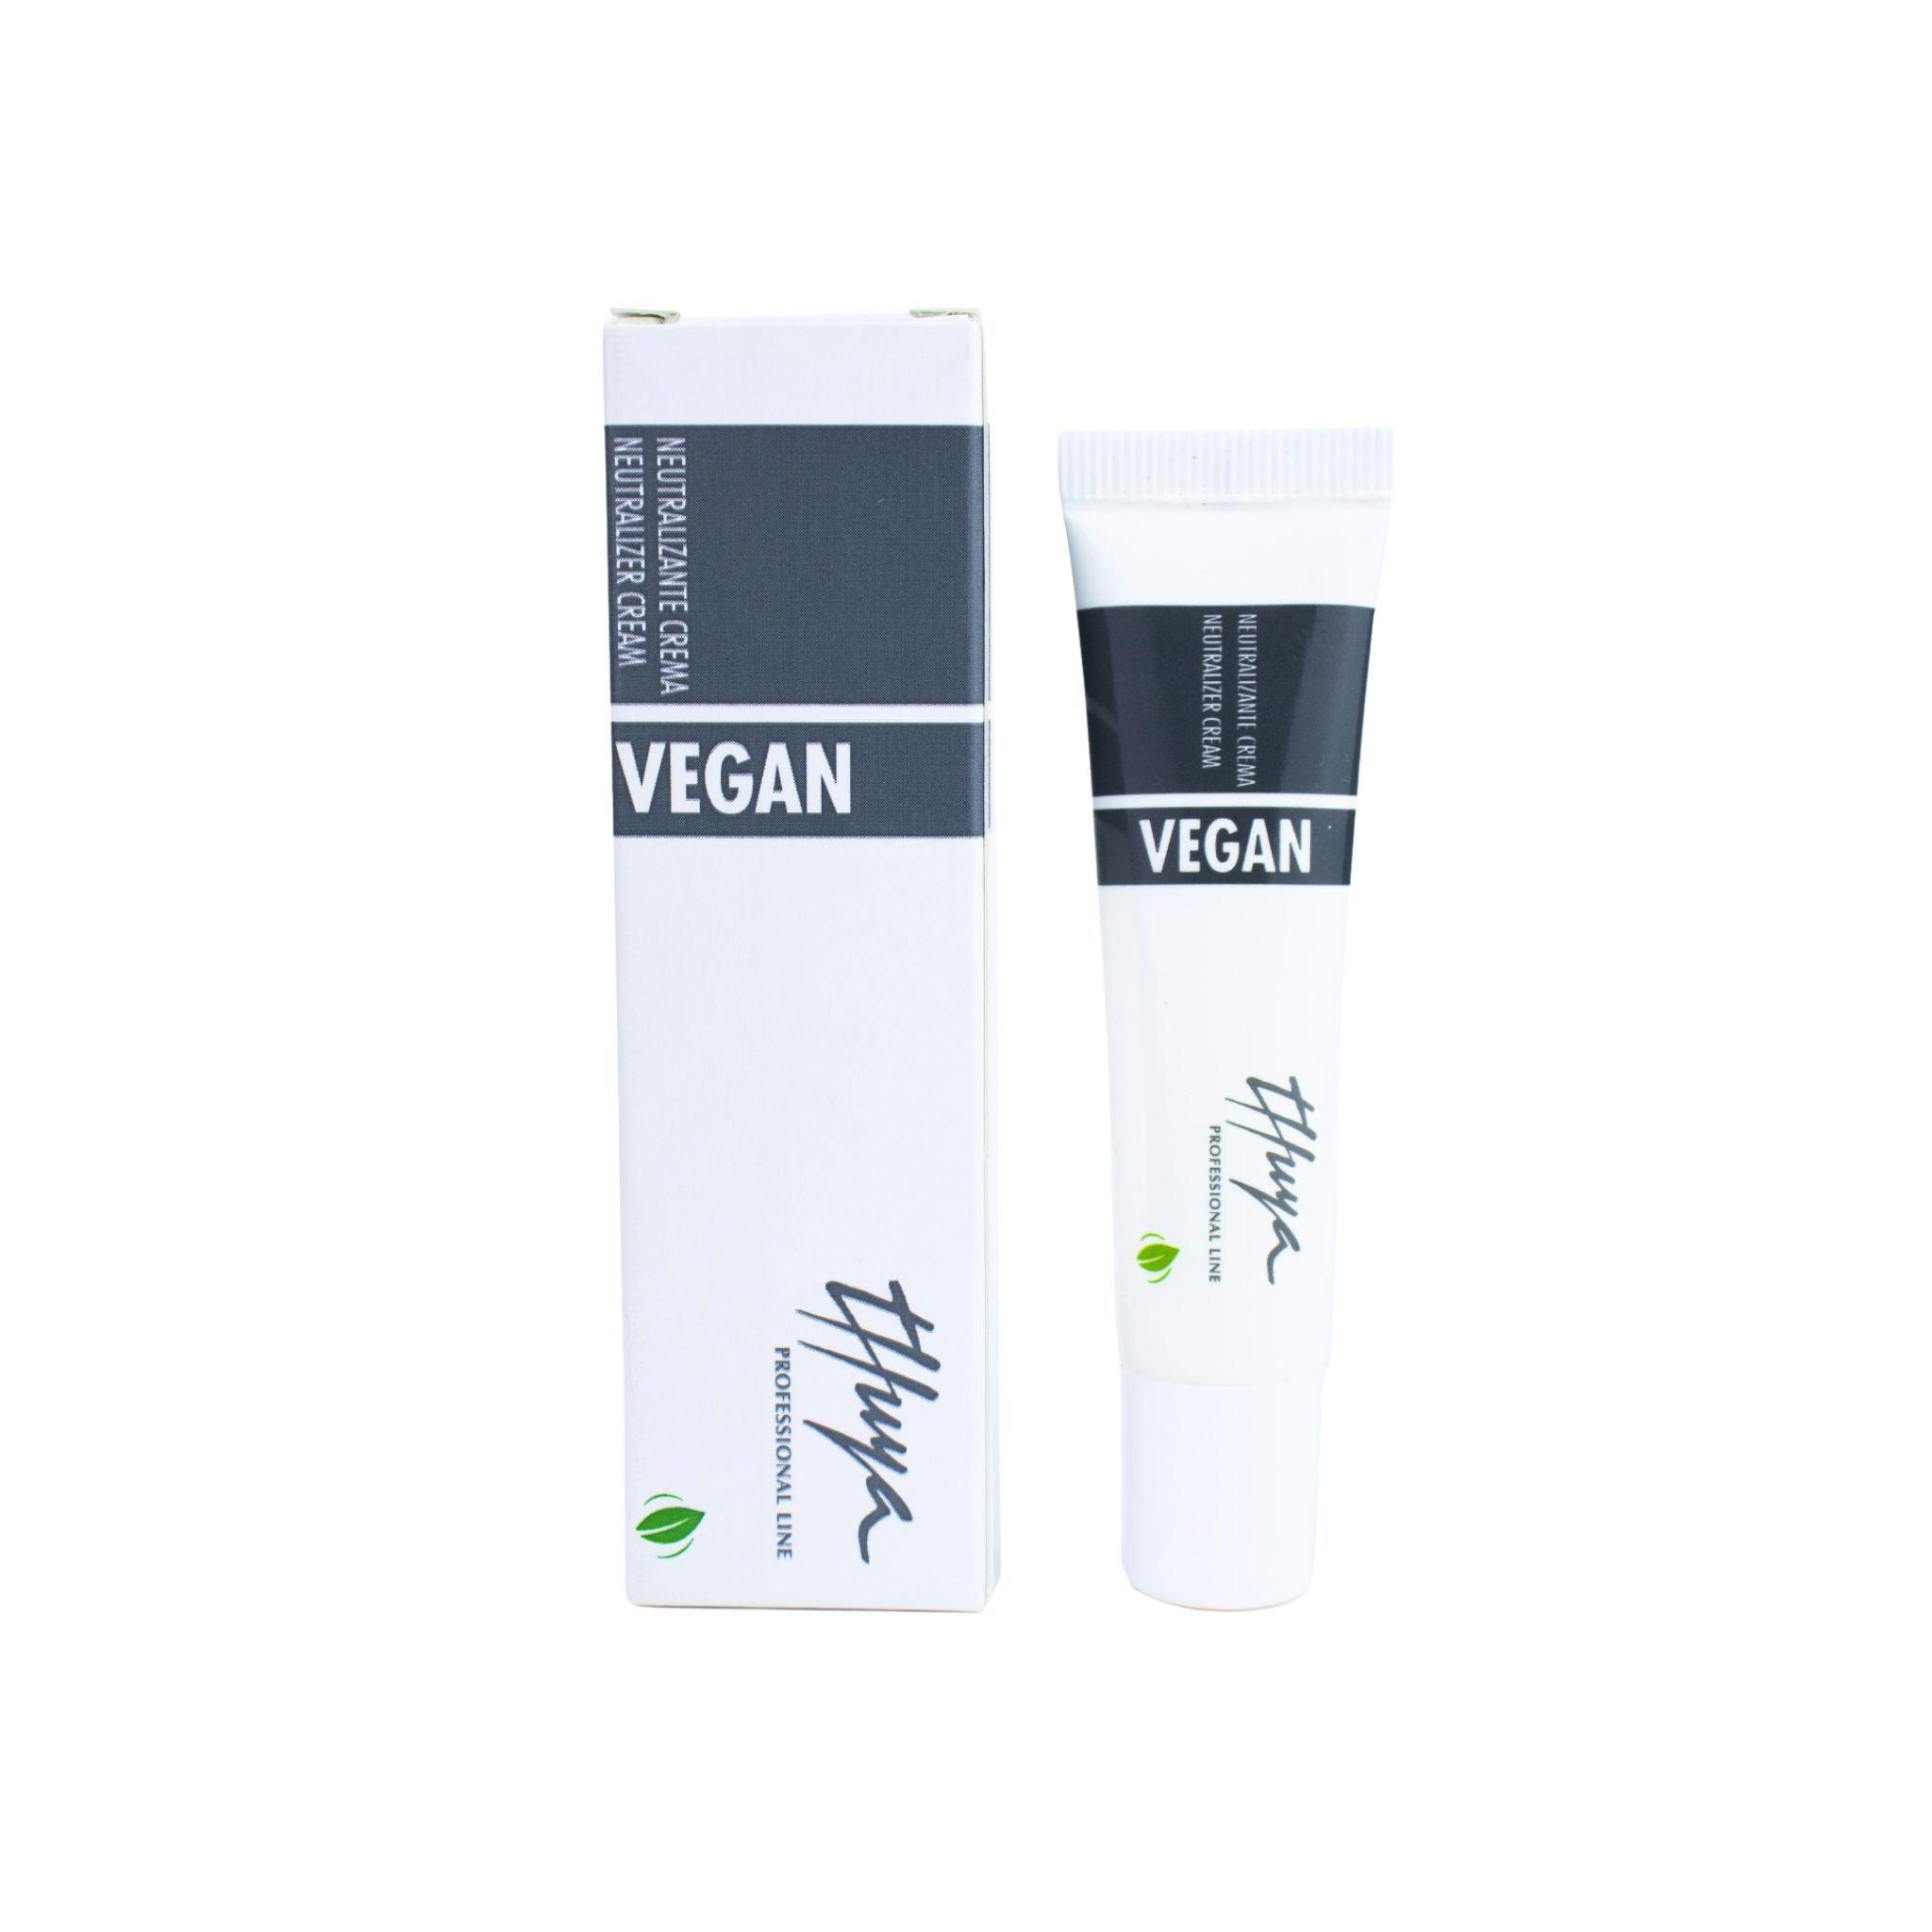
Thuya Vegan Neutralizer Cream - Step 2

Sale price$28.60 CAD Regular price$31.78 CAD

PRODUCT DETAILS

Vegan Line Neutralizer Cream Step 2 for Lash Lifts & Brow Lamination by Thuya 


Experience the difference in vegan innovations and provide your clients with the luxurious benefits of a vegan lash and brow lamination!


The Vegan Neutralizer Cream by Thuya has been skillfully reformulated to offer complete effectiveness without the inclusion of animal sourced ingredients. 


The Neutralizer Cream is essential to fix the hair shape once the cuticles have been opened with the Permanent Gel. It is designed to seal hair cuticles, allowing you to create the desired shape for the perfect look. The cream texture eliminates any potential for dripping, resulting to a smooth and effortless application. Experience the ultimate combination of comfort and safety for you and your client with its unique vegan formulation.


Size: 15 ml

Usage: up to 20-40 applications for lashes and brows

PAO: 12M


FOR PROFESSIONAL USE ONLY

BENEFITS
  • 100% Vegan, does not contain any ingredients of animal origin
  • Same great benefits as original line
  • Seal hair cuticles to create the desired shape
  • Same processing times as original line
  • Cream texture provides no drip formula
HOW TO USE

The amount of Permanent Gel should be equal to the amount of Neutralizer Cream used during Step 1. 

BROW LAMINATION STEPS

Processing Times:

  • Thin Eyebrow Hair: Permanent Gel and Neutralizer exposure time 7-9 min.
  • Medium Eyebrow Hair: Permanent Gel and Neutralizer exposure time 9-12 min
  • Thick Eyebrow Hair: Permanent Gel and Neutralizer exposure time 12-15 min. + the Pre- Smoothing


1) Clean the eye and brow area with the Thuya Water-Based Eye Makeup Remover. It’s an essential oil-free product for all eyelash and eyebrow treatments to prepare the skin and hair. Dry excess moisture with a tissue. 


2) Clean the area with the Thuya Brow Shampoo. Shake it before using it, the product will be applied with a mascara brush, this step should be done whether the clients are using make-up or not as it will remove any dust, oil, or sweat. With the mascara brush gently rub the treated area. 


3) Remove any excess with the Water Base Make-Up Remover.


4) Additionally clean the area with the Thuya Brow Scrub. With the help of a Lip Brush to scrub the area creating a gently friction against the hair.


5) The excess will be removed with the Water Base Make-Up Remover and once is dried with a tissue a mascara brush also will be used.


6) Once the area is completely cleaned, analyze the type of hair the client has to see if there is a need to use the Thuya Eyebrow Pre-Smoother and for how long it will be applied. 


7) In case the eyebrow is thick, with grey hair or rebellious hairs the Pre-Smoothing will be applied. In a godet we apply 6 drops and with the help of the cotton swab it will be applied all over the eyebrows, let it activate between 3 to 5 minutes.


If there is no need to apply the Pre-Smoothing once the area is completely cleaned the Permanent Gel will be applied. 


8) After the exposure time remove any excess with a dry cotton swab and continue with the Permanent Gel. 


9) The Permanent Gel will be applied with a lip brush or a micro brush and the eyebrow hair will be combed in an upward way. This product will be applied all over the eyebrow, if the hair is too thick will be applied in all directions. Depending on the thickness of the hair the product will be applied for more or less time.


10) Put osmotic film over the eyebrows. 


11) Once the exposure time is over, the Permanent Gel is removed with a dry cotton swab.


12) Apply the Neutralizer with an orange stick, lip brush or micro brush in the same way the Permanent Gel has been applied. The eyebrow needs to be combed as same as the desired result.


13) Cover again the area with an Osmotic Film. The exposure time will be the same that has been used with the Permanent Gel. 


14) During the exposure time, comb the eyebrow hair in an upward way and shaping it with the desired result. This last step can be done every 5 minutes or in the middle of the exposure time. 


15) Once the exposure time is over the Neutralizer will be removed with a moisturized cotton pad. Dry the treated area with a tissue and comb the hair.


16) In case that the dye is not used, the Regenerating Cream with Argan Oil will be applied. Apply a small amount and rub it to give some heat to the product, this way it will be easier to apply it using a mascara brush. 


17) If there is going to be a dye service after the Neutralizer. The eyebrow first will be combed on the desired shape and the Thuya Brow Paste will be applied with a dye brush around the eyebrow giving the perfect and desired shape on both brows. Dry with the treated area with a tissue and comb the hair.


18) Mix equal parts of the Thuya Dye and the Special Solution Oxidant Cream. The dye and solution mixture will be applied on the eyebrow, starting from the external part of the eyebrow to the inner part, letting it act for up to 10 minutes.


19) Remove the Dye with a moisturized cotton pad. In case that an ombre effect wants to be achieved, the Dye will be removed respecting the exposure time from the inner to the external part of the eyebrow. With the same cotton the Brow Paste will be removed.


20) Remove the humidity excess with a dry tissue and comb the eyebrow with a mascara brush.


21) To finalize the service, the Regenerating Cream with Argan oil will be used. Allow to sit for 24 hours.

LASH LIFT STEPS

1) Clean the brow area with the Thuya Water-Based Eye Makeup Remover. Dry excess moisture with a tissue.


2) Place your choice of lash lift shield onto the eyelid. 


3) Once shield is in desired position, apply lash lift adhesive on the Silicone Pad in sections and lift the lashes on the silicone pad in an upward motion. Make sure the lashes are separated and lined up in the same direction over the bump. 


Tip: Start lifting the lashes from the outside to the tear zone of the eyes, dividing it in three zones.


4) Once the lashes are well attached to the Silicone Pad, apply Permanent Gel (it will always be necessary to remove the first drop of the product.) The amount needed for this process is the size of a rice grain. Spread the product in the middle part of the eyelash, leaving approximately 1mm from the lash line.


5) Cover the eyelashes with an osmotic film and a tissue and let it act for 15 minutes.


6) After the allotted time, remove the product with a dry cotton swab.


7) Apply Liquid Neutralizer in the same manner as the Permanent Gel.


8) Cover it with osmotic film and a tissue. Let it act for another 15 minutes.


9) After 15 minutes, remove the osmotic film and tissue and thoroughly remove the product and the silicone pad with a moisturized cotton swab and/or pad.


10) Dry excess moisture with a tissue and comb the eyelashes up.


11) Once the eyelash lift is done, it is recommended to tint the lashes, to obtain better result. Tinting enhances, treats, and nourishes the hair.


12) With a cotton swab apply the Special Dye Protector Cream on the lower part of the eye, being careful to not touch the eyelashes.


13) Apply Protector Paper on the lower part of the eye on top of the Special Dye Protector Cream. The lower eyelashes need to be on top of the Protector Paper to proceed with the tint.


14) In a small mixing dish, mix equal quantities of the Thuya Dye and the Special Solution Dye. For each dye size (approximately a rice size) add one drop of Special Solution Dye.


15) Using a Dye Applicator Brush, apply the mixture on the eyelashes and let it act for 15 minutes.


16) After the exposure time, remove the excess of product with a dry cotton swab and with a moisturized cotton pad and start removing all the product.


17) Apply Regenerating Cream. Allow to sit for 24 hours.


TIPS

The Vegan line can be intermixed with the Thuya original lash lift and brow lamination line.

INGREDIENTS

Aqua, Cetearyl Alcohol, Stearyl Alcohol, Cetyl Alcohol, Hydrogen Peroxide, Ceteareth-33, Aminotrimethylene Phosphoric Acid, Sodium Stannate, Phosphoric Acid


Made in Spain 

SHIPPING, RETURNS & ROUTE PROTECT

SHIPPING


Standard Shipping: We offer free standard shipping on orders over $75 for Canada and the USA. This shipping option usually takes 1-8 business days within Canada, or 7-10 business days to the US, depending on your location.


Worldwide Shipping: Shipping fees will vary for each country, and additional fees may apply.


*Please note: International orders (outside of Canada) may be subject to customs fees. All customs fees are the sole responsibility of the buyer, and we are not responsible for any additional charges once your package has left our facility.


Wholesale & Distribution Shipping: Shipping fees will vary depending on the size of the package and the destination country. Unfortunately, our free shipping minimum does not apply to wholesale orders. The shipping fee will be quoted on top.


RETURNS


If you are not satisfied with your purchase please contact us by email shop@thebeautyhouse.ca and we would be happy to assist you. Please notify us within 7 business days after receiving the order. The Beauty House Shop cannot accept returns or exchanges on any opened packaging due to sanitization & health regulations. Shipping charges are not refundable.


The Beauty House Shop reserves the right to decline return and/or refund.


Please note, returns are at the expense of the customer. We sadly do not provide free returns at this time.


ROUTE PROTECTION


We have now partnered with Route to offer package protection against lost, stolen or damaged parcels while in transit.


For a small additional fee, Route Package Protection ensures safe delivery of your parcels, and provides the support and peace of mind you need if an unfortunate shipping event occurs. Route provides an easy fix with instant resolution, and is a completely self service portal.


At checkout, Route Protection is automatically activated, however, you have the option to opt out. Simply uncheck the box to turn off.


*When you opt-out of Route's Package Protection, The Beauty House Shop is not liable for any lost, stolen, or damaged packages.

Instagram

Follow us for daily tips & be the first to know about new products!

PRODUCT DETAILS

Vegan Line Neutralizer Cream Step 2 for Lash Lifts & Brow Lamination by Thuya 


Experience the difference in vegan innovations and provide your clients with the luxurious benefits of a vegan lash and brow lamination!


The Vegan Neutralizer Cream by Thuya has been skillfully reformulated to offer complete effectiveness without the inclusion of animal sourced ingredients. 


The Neutralizer Cream is essential to fix the hair shape once the cuticles have been opened with the Permanent Gel. It is designed to seal hair cuticles, allowing you to create the desired shape for the perfect look. The cream texture eliminates any potential for dripping, resulting to a smooth and effortless application. Experience the ultimate combination of comfort and safety for you and your client with its unique vegan formulation.


Size: 15 ml

Usage: up to 20-40 applications for lashes and brows

PAO: 12M


FOR PROFESSIONAL USE ONLY

BENEFITS
  • 100% Vegan, does not contain any ingredients of animal origin
  • Same great benefits as original line
  • Seal hair cuticles to create the desired shape
  • Same processing times as original line
  • Cream texture provides no drip formula
HOW TO USE

The amount of Permanent Gel should be equal to the amount of Neutralizer Cream used during Step 1. 

BROW LAMINATION STEPS

Processing Times:

  • Thin Eyebrow Hair: Permanent Gel and Neutralizer exposure time 7-9 min.
  • Medium Eyebrow Hair: Permanent Gel and Neutralizer exposure time 9-12 min
  • Thick Eyebrow Hair: Permanent Gel and Neutralizer exposure time 12-15 min. + the Pre- Smoothing


1) Clean the eye and brow area with the Thuya Water-Based Eye Makeup Remover. It’s an essential oil-free product for all eyelash and eyebrow treatments to prepare the skin and hair. Dry excess moisture with a tissue. 


2) Clean the area with the Thuya Brow Shampoo. Shake it before using it, the product will be applied with a mascara brush, this step should be done whether the clients are using make-up or not as it will remove any dust, oil, or sweat. With the mascara brush gently rub the treated area. 


3) Remove any excess with the Water Base Make-Up Remover.


4) Additionally clean the area with the Thuya Brow Scrub. With the help of a Lip Brush to scrub the area creating a gently friction against the hair.


5) The excess will be removed with the Water Base Make-Up Remover and once is dried with a tissue a mascara brush also will be used.


6) Once the area is completely cleaned, analyze the type of hair the client has to see if there is a need to use the Thuya Eyebrow Pre-Smoother and for how long it will be applied. 


7) In case the eyebrow is thick, with grey hair or rebellious hairs the Pre-Smoothing will be applied. In a godet we apply 6 drops and with the help of the cotton swab it will be applied all over the eyebrows, let it activate between 3 to 5 minutes.


If there is no need to apply the Pre-Smoothing once the area is completely cleaned the Permanent Gel will be applied. 


8) After the exposure time remove any excess with a dry cotton swab and continue with the Permanent Gel. 


9) The Permanent Gel will be applied with a lip brush or a micro brush and the eyebrow hair will be combed in an upward way. This product will be applied all over the eyebrow, if the hair is too thick will be applied in all directions. Depending on the thickness of the hair the product will be applied for more or less time.


10) Put osmotic film over the eyebrows. 


11) Once the exposure time is over, the Permanent Gel is removed with a dry cotton swab.


12) Apply the Neutralizer with an orange stick, lip brush or micro brush in the same way the Permanent Gel has been applied. The eyebrow needs to be combed as same as the desired result.


13) Cover again the area with an Osmotic Film. The exposure time will be the same that has been used with the Permanent Gel. 


14) During the exposure time, comb the eyebrow hair in an upward way and shaping it with the desired result. This last step can be done every 5 minutes or in the middle of the exposure time. 


15) Once the exposure time is over the Neutralizer will be removed with a moisturized cotton pad. Dry the treated area with a tissue and comb the hair.


16) In case that the dye is not used, the Regenerating Cream with Argan Oil will be applied. Apply a small amount and rub it to give some heat to the product, this way it will be easier to apply it using a mascara brush. 


17) If there is going to be a dye service after the Neutralizer. The eyebrow first will be combed on the desired shape and the Thuya Brow Paste will be applied with a dye brush around the eyebrow giving the perfect and desired shape on both brows. Dry with the treated area with a tissue and comb the hair.


18) Mix equal parts of the Thuya Dye and the Special Solution Oxidant Cream. The dye and solution mixture will be applied on the eyebrow, starting from the external part of the eyebrow to the inner part, letting it act for up to 10 minutes.


19) Remove the Dye with a moisturized cotton pad. In case that an ombre effect wants to be achieved, the Dye will be removed respecting the exposure time from the inner to the external part of the eyebrow. With the same cotton the Brow Paste will be removed.


20) Remove the humidity excess with a dry tissue and comb the eyebrow with a mascara brush.


21) To finalize the service, the Regenerating Cream with Argan oil will be used. Allow to sit for 24 hours.

LASH LIFT STEPS

1) Clean the brow area with the Thuya Water-Based Eye Makeup Remover. Dry excess moisture with a tissue.


2) Place your choice of lash lift shield onto the eyelid. 


3) Once shield is in desired position, apply lash lift adhesive on the Silicone Pad in sections and lift the lashes on the silicone pad in an upward motion. Make sure the lashes are separated and lined up in the same direction over the bump. 


Tip: Start lifting the lashes from the outside to the tear zone of the eyes, dividing it in three zones.


4) Once the lashes are well attached to the Silicone Pad, apply Permanent Gel (it will always be necessary to remove the first drop of the product.) The amount needed for this process is the size of a rice grain. Spread the product in the middle part of the eyelash, leaving approximately 1mm from the lash line.


5) Cover the eyelashes with an osmotic film and a tissue and let it act for 15 minutes.


6) After the allotted time, remove the product with a dry cotton swab.


7) Apply Liquid Neutralizer in the same manner as the Permanent Gel.


8) Cover it with osmotic film and a tissue. Let it act for another 15 minutes.


9) After 15 minutes, remove the osmotic film and tissue and thoroughly remove the product and the silicone pad with a moisturized cotton swab and/or pad.


10) Dry excess moisture with a tissue and comb the eyelashes up.


11) Once the eyelash lift is done, it is recommended to tint the lashes, to obtain better result. Tinting enhances, treats, and nourishes the hair.


12) With a cotton swab apply the Special Dye Protector Cream on the lower part of the eye, being careful to not touch the eyelashes.


13) Apply Protector Paper on the lower part of the eye on top of the Special Dye Protector Cream. The lower eyelashes need to be on top of the Protector Paper to proceed with the tint.


14) In a small mixing dish, mix equal quantities of the Thuya Dye and the Special Solution Dye. For each dye size (approximately a rice size) add one drop of Special Solution Dye.


15) Using a Dye Applicator Brush, apply the mixture on the eyelashes and let it act for 15 minutes.


16) After the exposure time, remove the excess of product with a dry cotton swab and with a moisturized cotton pad and start removing all the product.


17) Apply Regenerating Cream. Allow to sit for 24 hours.


TIPS

The Vegan line can be intermixed with the Thuya original lash lift and brow lamination line.

INGREDIENTS

Aqua, Cetearyl Alcohol, Stearyl Alcohol, Cetyl Alcohol, Hydrogen Peroxide, Ceteareth-33, Aminotrimethylene Phosphoric Acid, Sodium Stannate, Phosphoric Acid


Made in Spain 

SHIPPING, RETURNS & ROUTE PROTECT

SHIPPING


Standard Shipping: We offer free standard shipping on orders over $75 for Canada and the USA. This shipping option usually takes 1-8 business days within Canada, or 7-10 business days to the US, depending on your location.


Worldwide Shipping: Shipping fees will vary for each country, and additional fees may apply.


*Please note: International orders (outside of Canada) may be subject to customs fees. All customs fees are the sole responsibility of the buyer, and we are not responsible for any additional charges once your package has left our facility.


Wholesale & Distribution Shipping: Shipping fees will vary depending on the size of the package and the destination country. Unfortunately, our free shipping minimum does not apply to wholesale orders. The shipping fee will be quoted on top.


RETURNS


If you are not satisfied with your purchase please contact us by email shop@thebeautyhouse.ca and we would be happy to assist you. Please notify us within 7 business days after receiving the order. The Beauty House Shop cannot accept returns or exchanges on any opened packaging due to sanitization & health regulations. Shipping charges are not refundable.


The Beauty House Shop reserves the right to decline return and/or refund.


Please note, returns are at the expense of the customer. We sadly do not provide free returns at this time.


ROUTE PROTECTION


We have now partnered with Route to offer package protection against lost, stolen or damaged parcels while in transit.


For a small additional fee, Route Package Protection ensures safe delivery of your parcels, and provides the support and peace of mind you need if an unfortunate shipping event occurs. Route provides an easy fix with instant resolution, and is a completely self service portal.


At checkout, Route Protection is automatically activated, however, you have the option to opt out. Simply uncheck the box to turn off.


*When you opt-out of Route's Package Protection, The Beauty House Shop is not liable for any lost, stolen, or damaged packages.